Cheese Making Recipe of the Month
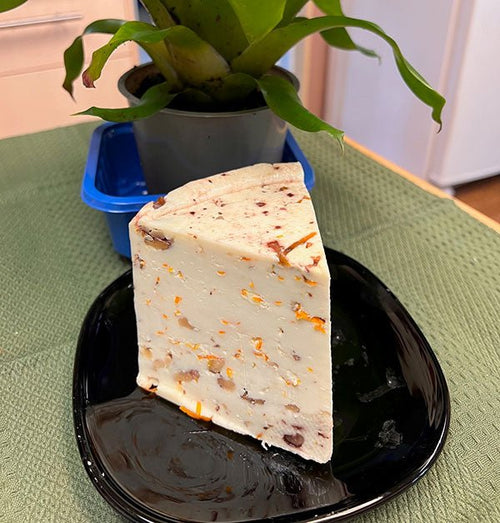
Sao Jorge
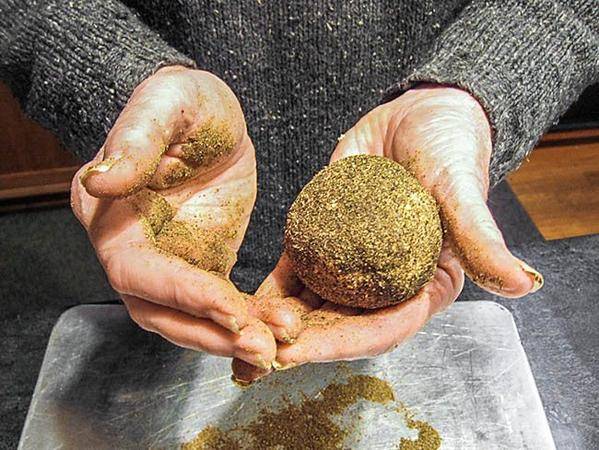
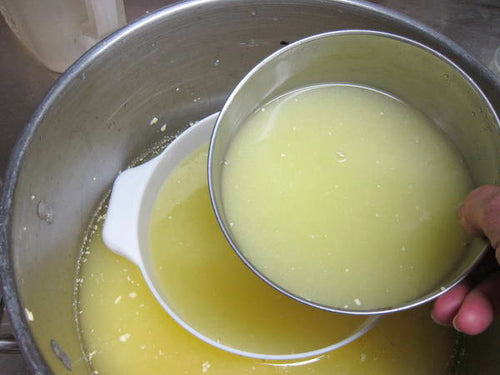
If you want to make Sao Jorge the whey it's made in the Azores, you will have to stay up late!
Island cheese makers take the milk from the morning milking and add it to the evening's milk. They start making the cheese immediately after they get the second batch, from 9pm - 4am (zzz)
Some of the whey from making that cheese is then used as the culture in the next batch. This gives the cheese a distinctive "bite."
Fortunately, we carry a culture, MA4002, which best matches the mix of bacteria in the "whey culture." So, with Jim's easy directions, you can create your own cheese (a little earlier in the day!)
Cheese Making Questions & Answers
Q. I am making your blue cheese from the website and nowhere in the recipe does it specify what type of milk to use. So, I used whole and the curds are falling apart. Maybe too much fat? Was I supposed to use 2%.
A. Making blue from a lower fat milk would not be a good idea. The primary advantage to blue is the mold working on the butterfat for flavor.
It sounds like you have allowed your curd to dry out a bit too much. In all cheese guidelines it is assumed that you are using a full fat milk unless a leaner milk is specified.
What Milk to Use?
Measuring pH?
Q. I love your recipe for blue cheese. Do you know what the pH of either the whey or the curds should be when ready to put in the mold?
A. As useful as pH can be for monitoring the acid development for those with experience, we always warn folks not to take it as written in stone. We usually do not bring pH targets into the recipes guides because of this.
We have worked with many traditional cheese makers over the past 15 years and rarely see them focusing on this. Instead, they are paying close attention to the changes in the milk to curd and into the final cheese. They do much as their grandparents did in evaluating the process with the touch, smell and feel as they go.
But, that said, and to show that we hold no secrets here, we expect the targets here to reach about 6.2 at 4 hours and 5.3 when draining at 6 hours. Truth is that we rarely measure, but we can taste the acid when it's right and the texture and feel tells us just as much - if not more.
For us, the pH meter and titration are for when things go wrong to clue us in to what is happening. Any time we do use the pH meter, we have already pretty much made our physical evaluations.
Aging Issues
Q. I have a question about aging blue cheese. I am aging it for the first portion of it's aging process in a plastic container, with the lid tightly shut, in my cheese refrigerator where I age my other non-mold cheeses.
I do not have a hygrometer, and am unsure if I've got the right level of humidity inside the plastic container. There is a little condensation on the underside of the lid.
A. If you are finding that you have a cloud forest in your aging space, then that is way too much moisture. The container needs to be left open a crack to avoid this and you need to wipe any free moisture out daily. The cheese needs to be turned daily as well.
Low Temp Yogurt?
Q. I am new to yogurt making. I want to use raw cow's and goat's milk. My question: Is it necessary to heat the milk to 180°? I want all the benefits of the raw milk left in the milk.
A. A true yogurt requires the milk to be heated to 185F and held for 20-30 minutes before being cooled to the culture temperature.
The following comes from our web page:
"The next and probably most important step in making yogurt is to heat the milk to 185F, and then hold it there for 10-20 minutes. This will prepare the whey proteins which are largely responsible for the thickening of the yogurt body. This can be done by setting the milk pot directly on the burner and begin heating with careful stirring to prevent scorching of the milk.
We hear from many folks using raw milk that they prefer not to heat the milk above 102F to protect the natural cultures in the milk. This is fine, but it will not thicken without the addition of milk powder, carrageenan or other thickeners. Also it will NOT be yogurt in the traditional sense."
If you do not want to heat the milk, your product will simply be a cultured milk and not yogurt.
Making Moister Mozzarella
Q. Mozzarella is my goal, not for pizza but for eating with fresh tomatoes as a salad or light lunch.
I have used raw milk and I have used organic regular pasteurized milk. I end up with cheese that is too hard and firm. It tastes right when melted, but is too chewy - not even close to what you get in Italy or from one of the old mozzarella makers still around New York.
I was inspired by a pro of 41 years who is famous as "The Mozzarella Man" around Manhattan. Once I had tasted his cheese while fresh, I had to try to make a reasonable copy.
A. The tough, chewy mozzarella is usually due to folks not developing the correct amount of acidity before trying to stretch. If you try to stretch too early, the cheese just becomes overworked as you squeeze all of the moisture out.
The acid test is described in our "mozzarella from culture" recipe online. No meters or test strips, but the old way of letting acid develop until the cheese stretches. Listen to the milk/curds as they develop. They are trying to tell you when it's time!
Have a cheese making question, we're here for you: info@cheesemaking.com
Meet a Fellow Cheese Maker
Bob Munroe from Ancaster, Ontario, Canada
Bob's picture might look familiar, because he's a bit of a celebrity. He produces and directs films, so if you've seen Blade II, X-Men, Dolphin Tale, The Tudors and a lot more, you know his work.
Bob came to our knowledge via Jon Little, who created a very clever cheese "cave." Bob contacted Jon and Jon told us about Bob. (Did you follow that?!)
Bob travels a lot for his work, but when he's home, he's a "back-to-basics" kind of guy. He grows his own vegetables, bakes bread, churns butter, pickles, ferments and makes his own cheese. Pretty cool for a "Hollywood type!"
Update: Anna Ford (10) from Longmont, Colorado
Anna was our "spotlight" last summer. At the time, she had just taken a cheese making class with Kate Johnson The Art of Cheese. Anna's mother, Kathleen, sent us this update on Anna's activities since then:
Anna has been working with her miniature Nubians on showmanship and utility (obstacle course) for the county fair coming up this August. She and her brother can't wait for fair week!
Her doe, Galaxy, is due to kid at the end of June. It will be her and her family's first kidding, although she was present at Galaxy's kidding last year. Galaxy and her kid(s) will be brought to the fair and Galaxy will compete in the miniature dairy goat competitions and Anna will compete with her in Dairy Goat Showmanship.
Cosmo, Galaxy's buckling from last year (now a wether), will be at the fair as a Utility Goat. He is a prankster and frequently riles the other goats up and causes various shenanigans. He recently figured out how to open his gate with his mouth. Anna has to keep a close eye on him!
Other than that, Anna has been attending weekly 4H Hippology meetings, where she is learning a ton about horses, and her team competed in a regional Hippology competition last month. She's also looking forward to her class's annual Musical Theater production where she will be playing Veruca Salt in Willy Wonka, Jr.
News From Fellow Cheese Makers
Update: Erik Diemer (17) from Stroudsburg, Pennsylvania
We featured Erik as our spotlight over a year ago. A few months after that, there was a fire in his family's cupcakery.
Last week they re-opened the business. (The picture at right is Erik with his mother, Lisa, his sister, Amanda and his father, Erwin.) We asked Erik to tell us more about these events:
The fire happened at two in the morning on July 6th, 2014. We had an air conditioner in our kitchen that malfunctioned and set the kitchen on fire. Luckily, nobody was hurt.
If it had started in a different part of the store, there would have been many tenants above us who would have been put in danger. All of our retail products and equipment were smoke and water damaged and the structure of the building was compromised.
It was astonishing the community support we had from all our customers and neighbor businesses. It took close to nine months to get us back in business. Over the break we rearranged the space for a larger kitchen.
I've learned a lot in the break about all different things from cooking to construction. Unfortunately, I didn't have a second to try new cheese recipes. Now that life is settling down a bit, I will start to experiment again.
I am still doing cheese demonstrations for the people of the Pocono mountains. At my school this week I am going to show the food classes how mozzarella is made and how easy it is to make fresh cheese in your home kitchen and to help students realize that REAL cheese only needs a few ingredients.
Update from Luigi
Last July, we interviewed Luigi Stranges from Ontario, Canada. Recently, he sent us these pictures of his father's 90th birthday party. We asked him about the hollowed-out Parmesan at right and he shared his method with us:
I first marked it with a scoring knife in a circular pattern in an outline to where the hole would be. I then cut it with a knife in along this line creating a shallow cone type shape, allowing me to get the “lid” off of the cheese. I then shaved the cone part from this removed circle of cheese until it became a flat lid. I then used the chisel to chisel out as much cheese as possible until only the rind/shell remained, creating a large cavity. With all of the removed cheese, I refilled the cheese as if it were a large bowl, and then put the lid back on. Once the party was over, we broke up the rind into large pieces and use it when we make fresh tomato sauce to impart that amazing parmigiano flavour! Nothing is wasted with this cheese.
Luigi Stranges, Niagara Falls, Ontario, Canada
Seriously?!
In 2013, we interviewed David Dawson, a master home cheese maker from Manitoba, Canada. We were catching up with him recently, via e-mail, and he shared one of his "bright ideas" with us. We thought you might want to hear about it:
Did I ever tell you I once tried putting the curds in cheesecloth in my washing machine on the spin cycle?
On the first occasion, it was with ricotta made from left-over whey and I just put the cloth containing the little bit of curd in the washing machine on "spin." Definitely NO rinsing.
The next time was with "proper" cheese from 4 gallons of milk in two equal batches using two presses. Looking at my notes from when I did it (I was surprised that I had even noted it!!), after cheddaring, I milled the curds, put them in my press and pressed at approximately 20 lbs for 45 minutes.
Then, I flipped the cheese and pressed at 40 lbs for 1 hour. Then, I put the cheese, still in the mould, in the washing machine on spin. Finally, I flipped it again and pressed it at 50 lbs overnight. The funny thing is, I have 2 stars against this batch and a note saying excellent flavour.
Here are some photos of the gadget I made to hold the mould in the washing machine. I had to chamfer it underneath so it would fit better in the machine, and by having 2 batches, it was in balance. I put a folded up piece of nylon fly screen (sterilised) to let any whey get out. The wheel of cheese was still in the mould, but I can't really show it here.
In the last picture, you can see the mould lying on its side. I seem to recall there was a bit of difficulty because as the agitator has three sections, I could not get the two moulds opposite each other for a good balance. Maybe I just did it off balance or maybe I put something in there on the 3rd section like a wet towel to get a better balance, if not a perfect balance.
As I said before, I don't think it made any difference because the curds need time for the whey to get out, not necessarily centrifugal force.
David Dawson, Manitoba, Canada
Please send your cheese making news & photos to: moosletter@cheesemaking.com


