


There are as many ways to make yogurt as there are stars in the sky!
We have 2 great recipes (beginner and intermediate) by Jim Wallace in our recipe section at cheesemaking.com. They cover making yogurt in the Yogotherm, the automatic yogurt maker, and the old fashioned way- in a pot. There is everything you ever need to know about making yogurt.
The process is exactly the same with the Instant Pot as it is with any other method, but you may not realize how many possible variations there are. If you’re already making yogurt with your Instant Pot, skim through the options below and maybe you will get some ideas.
The links are to relevant videos and articles. (The links to yogurt recipe articles are red and the links to videos are blue. All other links are purple.)
If you have the LUX pot (without the yogurt setting) – (click here), click here, (click here)
If you want to make Greek yogurt, you simply strain your yogurt in butter muslin, coffee filters or in any one of the many strainers available, like the Greek Yogurt Maker.
Disclaimer: We are fairly certain that some of these options are whey healthier than others, but we’re leaving it up to you to decide that.
Ingredients:
Milk
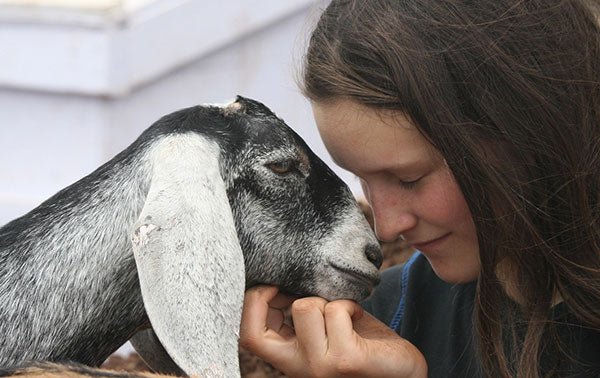
You can use the same process to make yogurt in the Instant Pot with whatever kind of milk you have – cow, goat (click here), or sheep with any percentage of fat.
—Goat milk generally makes a thinner yogurt, so powdered milk or gelatin is often added. (click here)
Type:
The type of milk you use will determine whether you follow the traditional way to make yogurt (as per the directions with your pot) or the “cold start” method. With the cold start, you skip the step where you heat the milk to 180F. (click here), (click here).
Traditional method: (click here), (click here), (click here)
—Raw: Follow the directions with the pot (traditional method). If you don’t want to heat it (cold start method), your yogurt will probably not be thick, but, of course, it will arguably be the healthiest of all the options. (click here), (click here)
—Pasteurized: Use the traditional method with whole, non-fat, 1% and 2%. (click here)
——Vat (or Batch) pasteurized: Slow pasteurized (held at 145F for a minimum of 30 minutes). If your milk is pasteurized but not homogenized, the odds are it has been vat pasteurized. Follow the directions with the pot (traditional method). (click here)
——HTST (high temp, short time) or flash pasteurized: Held at at least 161F for a minimum of 15 seconds. Organic Valley is a common brand.
—Ultra-pasteurized (UP): Heated to 280F for 2 seconds. Can be whole, 2% or skimmed. Most brands of store-bought organic milk (like Horizon) are UP. You can use either the traditional or the cold start methods, but, with the cold start you will probably want to add thickeners and you may need to incubate at least 15 hours. (click here), (click here)
—Ultra-high temp pasteurized (UHT) and shelf-stable: Heated to 280F for longer than 2 seconds. You can use this with the cold start method, but it may take longer to set. (click here)
—Ultra-pasteurized and ultra-filtered: Filtered to have 50% more protein, 30% more calcium, half the sugar of regular milk and to be lactose free. (Fairlife, CarbMaster, & MooTopia are the most common brands. In Canada it is Natrel.) This kind of milk is used for the “Fairlife” or “No Boil” (or cold start) method. (click here), (click here), (click here)
—Organic: When this is available in the super market, it is generally ultra-pasteurized, so you can use either the traditional (click here), (click here) or the cold start method.
—Lactose free: You can buy this and use it, but, if you incubate regular milk for 15-24 hours, all the lactose will be gone anyway. Traditional method (click here). Ultra-filtered milks (cold start) are lactose-free. (click here)
—Instant powdered milk: To use, mix it with less water than in the directions on the box. (click here)
——For the cold start method, you can use instant powdered milk.
——Regular dry powdered milk requires heat to dissolve, so use the traditional method.
—Evaporated milk (diluted): (click here)
——Goat (click here)
—Half & half: Most is ultra-pasteurized, so you can use the cold start method with it. (click here)
—Cream: If you can get cream that isn’t ultra-pasteurized, you can use the traditional method.
——You can add it when the milk has been heated to 180F. (click here)
——It is frequently added when using powdered milk.
—Non-Dairy milk:
——Soy milk: This is the only non-dairy milk you can use without a thickener. Get the kind with 2 ingredients – water and soybeans. (click here), (click here), (click here), (click here)
——Coconut milk (full fat, usually canned): Refrigerate before. (click here), (click here)
——Almond or rice milk: These need thickeners like gelatin, agar agar, tapioca starch, etc. which need to be heated, so the cold start method doesn’t usually work. (click here)
—Others:
——Cashew yogurt
——Coconut-Cashew yogurt
Additions to the milk:
If you add any of these to your milk, you may need to add a little more starter and you may need to incubate longer than 8 hours.
—To thicken:
——Cream (click here), half & half or evaporated milk (click here)
——Dry milk powder (click here)
———Cow, goat or soy
——Gelatin (This can result in a jell0-like texture. (click here))
———You can stir this in before you heat the milk (click here), (click here)
———You can also add it (diluted in a little cold milk) after the milk has been heated to 180F. (click here)
——Pectin (The taste calls for some sugar added with it and this is necessary for sugar-activated pectin.) (click here-comments section)
——Agar (click here)
——Guar & xanthan gum (can be used with the cold start method)
——Tapioca starch (used like agar) (click here)
——Arrowroot starch
——Ultra-gel (modified corn starch) (click here)
—To flavor:
—You can add flavoring to the milk after you have mixed in the starter and before you incubate it, particularly if using the cold start method. However, it is better to add it at the end, when the yogurt has set.
——Vanilla extract or vanilla bean (scraped) (click here)
——Sugar (click here), (click here)
——Sweetened condensed milk (click here), (click here)
——Natural Bliss Sweet Creamer (click here)
——Fruit (Some add it to their jars and do not stir in.) (click here)
Starter
The amount of starter varies with the amount of milk you are using. Follow your recipe.
—Cultured yogurt from the store:
——The best has only cultures and milk, but that isn’t necessary, as long as the yogurt contains live cultures. It can be either regular yogurt or Greek style. (click here)
———Fresh or frozen.
——Using flavored yogurt as your starter will not flavor your finished product.
—Yogurt from a previous batch of your own yogurt:
——Fresh or frozen (click here), (click here)
—Whey from a previous batch of your own yogurt: (click here)
——Fresh or frozen (click here)
—Freeze-dried yogurt culture from a store or online: (click here)
——We sell several kinds (below) and almost all cheese making suppliers carry different kinds as well.
———With ‘direct set’ cultures (like the ones below), you can make yogurt several times from one batch to another.
————Sweet yogurt
————Creamy yogurt
————Yogurt Type 1 (large pack)
———Re-culturable starters (often erroneously called ‘heirloom cultures’) are meant to go on longer from one batch to another.
————Bulgarian
—Lactose-free yogurt: (click here)
—Vegan yogurt: It’s OK if this yogurt includes thickeners, etc.
—Probiotic pills:
——With coconut milk (click here), (click here)
Process
Before starting
Preparing the Instant Pot:
—Some folks take the sealing ring out of the pot, clean it and put it back in (click here), while others just leave it off. (click here) Some use a dedicated sealer for their yogurt.
—You can also buy a separate lid to use for your yogurt.
—Some add a few drops of lemon or purification essential oil to the water in the pot to help remove smells from making other recipes. (click here)
Sterilizing or sanitizing:
—If you will be incubating for longer than 10 hours, it is a good idea to sanitize or sterilize your insert pot, bottles and tools first.
——The cooking pot, spoon and thermometer:
———Pour boiling water over it and into it and dry with a paper towel.
———Steam it for 1 – 3 minutes with 1/2 -4 cups water in it. (click here),–(click here), (click here)
——Jars:
———You can sanitize your bottles and scald your milk at the same time. (click here)
After sterilizing:
—Be sure the insert pot and the Instant Pot are cool before continuing.
——You can put the insert pot in the fridge while waiting for the Instant Pot to cool down. (click here)
Adding milk to the Instant Pot
You can add thickener to your milk at this point (see Additions to the Milk above).
—Pour directly into pot
——First, fill with ice cubes, leave in for a minute and then dump out to chill the pot (which keeps the milk from sticking). (click here)
—Pour into jars (click here)
—Pour into any oven safe container that will fit in your pot (click here)
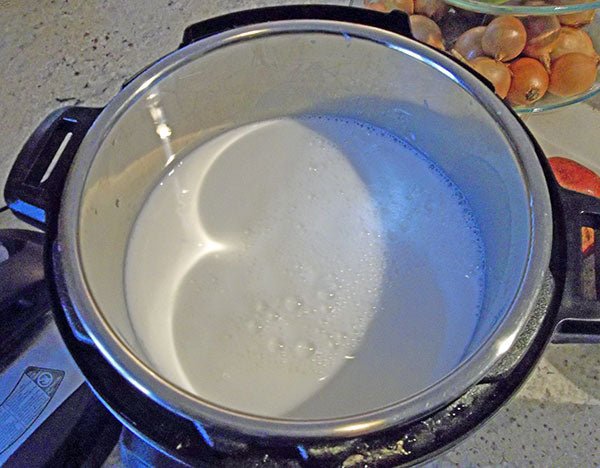
Heating the milk to 180-185F
Skip this step if you are using the cold start method with ultra-filtered milk (like Fairline). (click here), (click here)
Directly in the insert pot:
—When using 1 gallon of milk or less, push the yogurt button (it will say boil) and wait until the buzzer goes off and it says Yogt.
——You can whisk it every 10 minutes during this step to speed up the heating process and keep the milk from scalding. (click here), (click here)
Open the lid and check the temperature.
——If it isn’t 180-185F:
———Use the saute function on low and stir until it’s up to temp. (click here)
———Run the scalding program once or twice extra. (click here)
——Higher elevations: It may take 2 or 3 scalding cycles to bring the milk to 180F.
You can heat it the whole time with the saute function if you prefer. (click here)
—In jars:
—Add 1 -2 cups of water to the bottom of the pot before putting in the rack.
——Place jars of milk uncovered on rack. Set steam handle to “steaming” and steam for 1 minute. Hit “cancel” and let the pot cool using the natural release method. (click here), or use the “quick release” (click here), or unplug and allow to cool (click here).
——Or, loosely cover the jars and steam for 2 minutes. (click here)
Holding at temp (optional)
—Holding for 3-20 minutes will usually thicken the yogurt.
——To “hold” the milk at 180°F for 5 minutes, press Yogurt and adjust again. This turns the heat back on. (click here)
——Or, use the saute function. (click here), (click here)
Cooling the milk to 105-115F
Options:
—Leave it in the pot to cool off with the top of the Instant Pot on. This is time consuming, but many report it yields a thicker yogurt in the end.
—Leave it in the pot with the top off. (Jars will take longer to cool down (up to 1 hour.)
—Remove the pot and put it on the cooling rack to cool off. Check it regularly. (click here)
——If using bottles, remove them from the pot (carefully!).
—Remove the pot and put it in the fridge. (click here)
—Remove the pot and put it in cold water in the kitchen sink. (click here), (click here), (click here)
—Remove the pot and put it on ice until it cools to 115F. Stir it but do not scrape the bottom of the pot where there may be scalded yogurt. (click here)
Removing the skin
If there is skin on top of the yogurt, remove it. (click here)
Adding the culture
—If using freeze dried yogurt culture: Sprinkle on top and stir. (Directions are on the packets.)
——If using bottles and freeze-dried cultures, pour the milk into a larger pot, add the culture and then pour the milk back into the jars.
—If using yogurt from the store or a previous batch:
Some folks let the culture get to room temp before they add it. (click here)
——In the pot – mix it in with some milk from the pot, then add to the pot. (click here)
———When whisking or stirring in the culture, try not to touch the bottom of the pot where there may be scalded milk. (click here)
——In bottles – put a little yogurt into each bottle with the warm milk and stir. (click here)
———Put covers on the jars loosely (without the seals).
—Note: Using yogurt from previous batches as a starter for the next may result in the yogurt becoming increasingly sour (tart) with each batch, so, use fresh starter every 2 or 3 batches.
Keeping the milk at 115F while it sets (incubating)
If using jars, cover loosely to keep condensation from dripping into the yogurt from the cover. (click here)
The vent can be pointed in either direction during this step.
Setting:
—Less – not recommended
—Normal Most popular choice (click here)
—More
Press the Yogurt button and it will default to 8 hours.
You can change the setting to more hours, but the yogurt will be tangier the longer you let it set. Times range from 8 – 24 hours. (click here)
If you have used less culture than usual, incubate for more time. (click here)
When done, Yogt appears. Press the cancel button and unplug the pot.
If you are asleep when the cycle is done, it’s OK to leave it in the pot for a few hours.
Refrigerating
Try not to stir the yogurt until it has chilled down.
Leave it in the pot, cover and put the pot in the fridge or transfer to smaller containers.
If there is cream on the top (as with raw milk), you can skim it off and use it as a substitute for sour cream or butter.
Save some for future batches.
If flavoring
Optimal: Put your flavoring in the bottom of your containers and spoon your yogurt in on top of it. Then, mix it when you are ready to eat.
If making drinkable yogurt, blend yogurt with flavorings
If you are making Greek-style yogurt, it is best to strain the yogurt and then add the flavorings.
Flavors
Any kind of sugar or sweetener
—Agave
—Coconut crystals
—Honey
—Liquid monk fruit
—Maple syrup
—Stevia
—Vanilla stevia
Extracts (vanilla & any other)
Fruit
—Apples
——Apple butter
——Applesauce
——With cinnamon, cloves, raisins and sweetener
—Bananas
—Berries (add citric acid to keep the color bright)
——Fresh berry compote
——Raspberry compote
—Date puree
—Jams
—Key Lime curd
—Lemon curd
—Mango banana lime
—Papaya
—Peaches
—Pears, ginger & sweetener
—Preserves
—Prune puree
—Pumpkin Apple Butter
Chutneys
Herbs & spices
—Cardamom
—Cumin & cayenne
—Herbs de Provence
—Lemon & dill (for fish)
—Mint & coriander
—Thyme & sage (for chicken)
—Tomato & oregano (for pasta)
Jello mixes
Nuts & Seeds
—Peanut butter
—Walnuts, raisins & maple syrup
—Chia Seed Jam
Powders
—Cocoa powder
—Peanut powder
Pudding mixes
Salsas
Spreads
Chocolate-hazelnut
Syrups
—Chocolate
—Fruit
Vanilla bean paste
Vegetables
—Pumpkin puree
—Sweet potato (mashed)
Whey protein powder


