


 |
| Douglas Lumley |
I have done two posts in this past year about Douglas Lumley and his wife, Jan (one with their recipe for Asiago Pepato and another with their pictures of Tuscany). They have a great website, The Weekend Artisan and they teach cheese making classes. In fact, they have two upcoming workshops, October 20th and November 10th at Bay Leaves Larder in Chandlers Ford.
I asked Doug what it’s like to be a “weekend artisan:”
I love making my cheeses and am very proud of the cheeses I produce; it’s part of how I relax, making things that interest me. The cheese making is only part of what we do, both Jan and I believe that we should take control over
and produce as much food as we can, but we also recognize we can’t do everything.
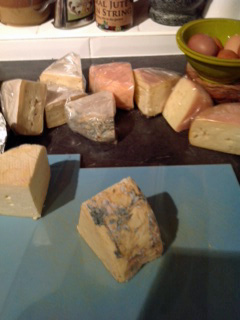 |
| A few of Doug’s cheeses |
I grow almost all of our fruit and vegetables, we use these to eat and in our chutneys, jams (I think this is jelly in the USA), ketchups and other relishes. Jan bakes, we make our own Bacon and Sausages, this is for taste and quality control reasons. I keep Bees for the Honey and the environment. Chickens for the Eggs etc. We also make some Liqueurs just for fun and anything else that takes our fancy or interests us.
We have lived in France for some time and holiday in Italy, so, for us, good food, wine, cheese and bread are all important to us and we want to share this love of good things with others.
I just love that rather than going to the supermarket, you can make it yourself, this includes quality artisan cheese. We just want to encourage others to make small changes in their lifestyle which would mean they make more for themselves; hence the website and the cheese making courses.
When I saw Doug’s post about Fontina, I jumped at the chance to give you his recipe. Doug makes a point of not calling it Fontina because he sells it in limited quantities and the name is protected. He told me he used Fontina as the basis for this cheese, but changed it slightly. He calls it Chandlers Choice because he and Jan live in Chandlers Ford, UK.
Chandlers Choice (Fontina) Recipe
By Douglas Lumley at The Weekend Artisan
Here is a recipe for my version of Fontina, or as I call it – Chandlers Choice. This is a lovely versatile cheese, which, if eaten young is mild, creamy and fresh, if aged, the lipase helps the cheese to mature into a stronger more robust flavour with a terrific aftertaste, see my cheese list for further details.
I use:
10 litres (2 + 5/8 gallons) of 2% fat, pasteurized milk for this recipe (you can add cream if you want to).
½ teaspoon of powdered Mesophilic starter. (MA011 or 1 packet of C101)
¼ to ½ teaspoon of lipase powder (to taste).
½ teaspoon of calcium chloride (not essential). Dilute as below.
1/2 teaspoon of rennet diluted in ¼ cup of cooled boiled water. (1/4 teaspoon if using vegetable rennet)
Cheese salt for making brine (see washed cheese article for percentages).
 |
| Fig 1 |
 |
| Fig 2 |
 |
| Fig 3 |
 |
| Fig 4 |
 |
| Fig 5 |
My Method:
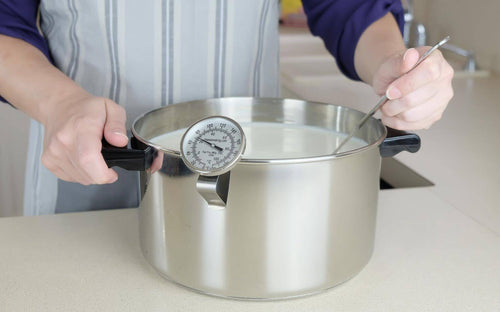
In your usual stainless steel 10 litre (2+5/8 gallon) cheese making pan, slowly raise the temperature of the milk to 88°F (30°C) then turn off the heat.
Sprinkle the starter over the milk, mix in well and let it stand for a while, then add the lipase, I let all of that ripen for half an hour to 45 minutes.
If using, add the calcium chloride and mix in, then a couple of minutes later, the rennet, once again mixing in well; cover and maintain temperature.
Once you have a set which gives you a clean break (about 45 to 60 minutes) cut the curd into 15 cm or ½ inch cubes then stand for 5 minutes. Stir the curd for 5 minutes then start raising the temperature slowly to 102°F ( about 38°C) stirring every couple of minutes to prevent the curd from matting (Fig 1).
Having reached the required temperature switch off the heat and let everything rest, the curds will sink to the bottom of the pan and mat together (Fig 2).
I then place the curd into my ever faithful Laude Gouda mould* and press in my New England cheese press at 40 pounds for 2 hours, take out the cheese, turn it and re press at 50 pounds for a further 2 hours, turn again and stand at 50 pounds for 12 hours or overnight.
Make up some medium – heavy brine (15% salinity) in a bowl large enough to rest the cheese in for 12 hours, turning the cheese after 6 hours.
After the specified time, remove from the brine, wipe dry with paper towel or wipes, then place in the ripening box; turn the cheese every day and dry any moisture from the ripening box until the cheese starts to form a rind (Fig 3).
You will find the cheese needs to be rubbed or dressed with salt once a week to prevent the growth of mould on the outside.
After a couple of weeks, the rind will be dry to the touch and not forming mould, at this point the cheese should be rubbed with olive oil to keep the rind moist and reasonably soft (Fig 4).
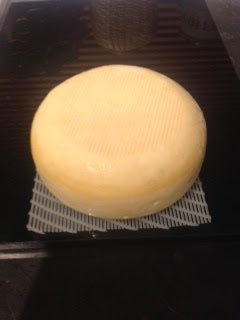
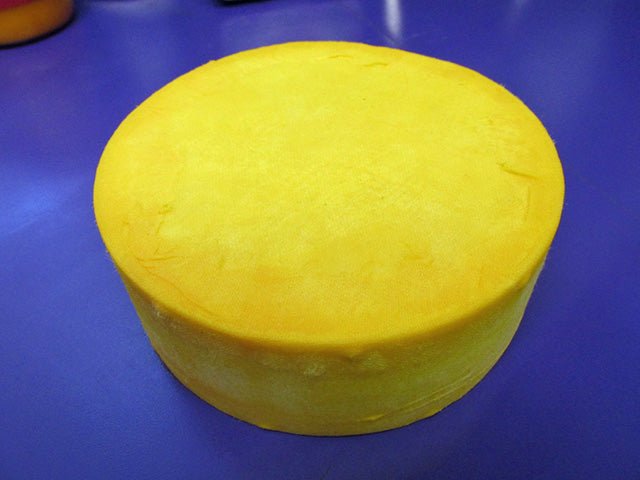
The cheese is now ready to go into the fridge at about 4°C, you can wrap it in cheese wrap if you wish to, but I normally don’t bother. It’s ready to eat after 6 weeks or for stronger flavoured cheese, 3 months. If you are going to wait for the 3 months, you will need to keep checking the cheese every week, turning and occasionally dressing in olive oil (Fig 5). It would also be worthwhile wrapping the cheese if you are going for that period of time.
* For those of you who don’t have a Laude Gouda, the process is as follows:
Line a 2 lbs cheese mould with cheesecloth, fill with curds, cover with the cloth and press at 10 lbs for 10 minutes.
Take the cheese out of the mould, peel back the cloth, turn the cheese and place back in the cloth lined press, placing a pressure of 10 lbs for 30 minutes.
Repeat the process once again only this time put 20 lbs of pressure on the cheese for up to 12 hours.
After that place in the brine and follow as above.


