


Bob Albers in Mandeville, Louisiana sent us this write-up on using hose clamps to aid in flipping Camembert. It would also work with any other flipped cheese – you just need to get a hose clamp that fits the mold you are using.

Bob Albers
Flipping Camembert
by Bob Albers*
About a week ago or so, I had the urge to make Camembert. I looked up Jeri Case’s 5 part blog recipe and began to think about the challenge of flipping the cheese.
Recalling the mess that my first attempt made trying to flip 4 cheeses a’ la Gavin Weber, I thought there must be a better whey. I decided that I could fasten 2 cheese boards together with the molds and sushi mats between them using stainless steel threaded rod as seen here in photo #1. This would hold the cheese molds fast while they were being flipped. No whey that one could get loose. I began my cheese making using this method and all went well.

My daughter phoned just about the time I was to flip the cheese. I had no problem doing that. I bragged about my inventiveness to my daughter, explaining the Camembert process and how I solved the problem of losing control of the molds while flipping.
Her impression was that my solution was too complicated. Why not cover the ends of the molds with cheese cloth and fasten it in place with embroidery hoops. Now, I know nothing of embroidery hoops. I looked up some sources online but couldn’t find any that were compatible with my Camembert molds (M7 from cheesemaking.com).
Now, I happen to be a retired engineer. Giving the matter a bit of thought, I thought “hose clamps.” They come in all sizes and have many options like quick release varieties and key tightening variations. I stopped by my local home center store and looked at what they had. I settled on sampling 2 varieties. One was a set of 2 clamps with thumb screw tightening mechanisms intended to fasten the exhaust hose on a clothes dryer, the second 2 were just the standard variety with a normal hex headed screw for tightening.
Time to try them out. It’s also time to flip the cheese. To make the transition, I first removed the top cheese board and sushi mat I then placed a flour sack towel (that’s what I use instead of butter muslin) over each mold and secured it in place with one of the hose clamps.

Then I reassembled the cheese board and sushi mat so I could flip the cheese.

Here, the cheese is flipped:

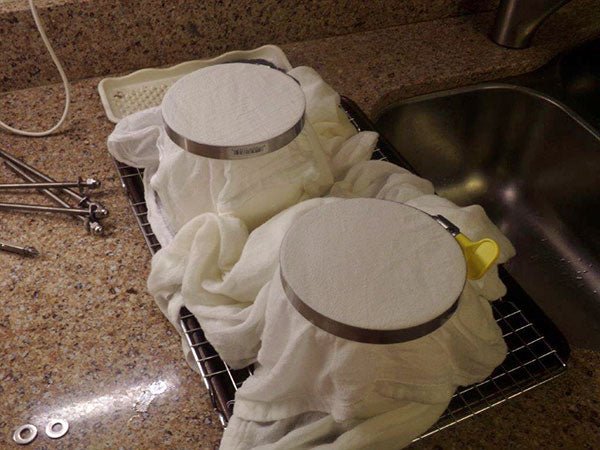
So I can remove what was the bottom board and mat. In Photo 6 here, I have placed the other end of each towel over the respective mold and secured it to the mold with another hose clamp:

Here I show just how stable and secure the whole thing is. You couldn’t do this before.

Its time to remove the old flipping assembly…

and place the molds on a rack atop a cooling rack on the cookie sheet that I’m using for whey collection.

In conclusion, the thumb screw version hose clamp is easier to deal with than the normal hex headed screw version. Also, the next time I try this, I’ll trim the cloth to a more appropriate size. What I did was good enough for proof of concept.
 *About Bob
Bob is a retired electronics engineer who has traveled all around the world, but now lives in Mandeville, Louisiana. He has written 12 articles for us so far (including this one), and we have done one about him (click here). We’re very grateful to him for his contributions to our community of home cheese makers.
These are his previous articles, listed in order with the most recent at top:
Creole Cream Cheese Recipe #2
Calculating Weights for the Dutch Style Press
Be a Court Appointed Special Advocate (CASA)
Time Keeping Spreadsheet for Making Cheese
Kummelkase (Caraway Cheese)
Cream Cheese Experiment
Bob’s Homemade Curd Cutter – Part 2
Bob’s Homemade Horizontal Curd Cutter
Making a Drying Box
About Cooking Curds
Creole Cream Cheese


