


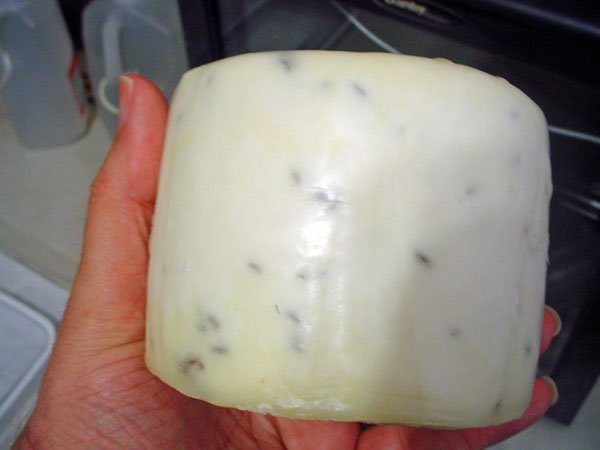
 Kümmelkäse (Caraway Cheese)
By Bob Albers*
July 5, 1917! That date isn’t reported in the history books the way it should. We celebrate Washington’s birthday, Lincoln’s birthday and numerous others throughout the year. Yet, we somehow neglect to celebrate the birth of the world’s greatest father, Henry Albers.
I know many of you will nominate others for this accolade but, as I don’t know them, I’m unable to support your proposition. Also, I must admit to a fair amount of prejudice, as he was my father. This year, my brother & sisters will gather to celebrate the 100th anniversary of his birth.
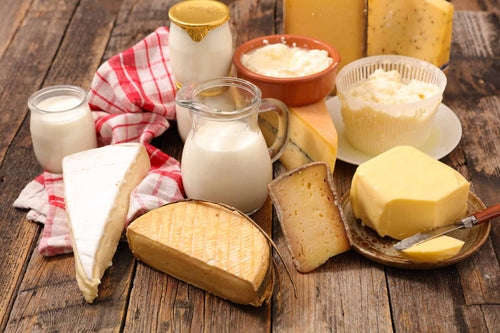
What is an appropriate way to celebrate such a milestone? The norm for a birthday is with cake and ice cream, but he was diabetic. I’m diabetic and so is my brother. That’s probably not a good idea. What then? He had his favorites in the foods & wines. Among those is a kind of cheese we can no longer find in the local stores – Kümmelkäse!
The local grocer who sold the cheese is no longer in business. As I attempted to research this dairy delight, Jim Wallace of cheesemaking.com suggested it might be the Caraway Gouda (the recipe for which can be found on page 118 in Home Cheese Making). I think that’s the best answer I have to date. If anyone else has an idea, please share it. I’d like to know.
OK, let’s make that cheese…
The first step is to gather all of the equipment and ingredients you will need. They are:
1. stainless steel pot large enough to hold 2 gallons of milk
2. 3 small glass or ceramic bowls, 1 each for the caraway extract, calcium chloride & rennet solution
3. ¼ cup measuring cup
4. 2 butter muslin sheets
5. horizontal curd cutter
6. curd knife
7. 2 cheese/sushi mats
8. measuring spoons
9. digital thermometer (only the probe is sanitized)
All of the above items are sterilized in boiling water for 15 minutes.
Gather the following ingredients:
1. 2 gallons whole, pasteurized milk
2. non-chlorinated water
3. One packet Mesophilic C101 starter culture
4. 1/4 rennet tablet
5. calcium chloride
6. 1 tbsp caraway seeds
Directions:
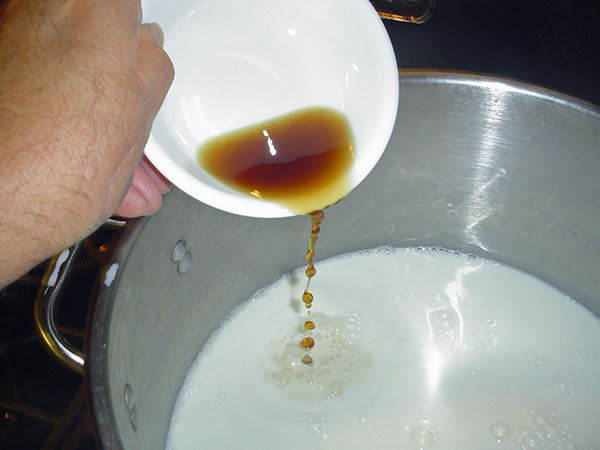
While the equipment is being sterilized, place the caraway seeds in a small pot with 1/2 cup of non-chlorinated water and bring to a boil.


Strain the flavored water into a small bowl and let it cool.

While the flavored water is cooling, lay out your sterilized equipment (I lay mine on a flower sack towel on my counter).

Pour the milk into the pot (I use the same one in which I sterilized my equipment).

Add the flavored water.
Heat the milk to 90° F.

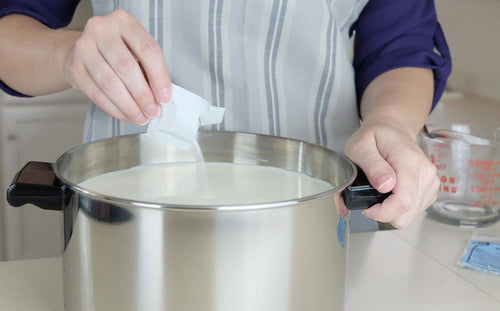
When the milk is at temperature, sprinkle the starter culture on the top of the milk so it will re-hydrate (about 5 minutes), then stir it in.

After the milk has ripened (about 10 minutes) add the calcium chloride if you’re using store bought pasteurized-homogenized milk. (Although the photo looks as though I might be adding some really thick liquid, I’m not – its just that my camera is really fast.)
Add the rennet and stir.

Let the milk sit covered for an hour or longer until it gives a clean break.

The curd is now ready to be cut into ½ inch cubes. First, I use my horizontal curd cutter.

Then, I use my curd knife to make the vertical cuts.

Stir the cut curds gently for about 10 minutes and let them settle for 5 minutes. While waiting for the curds to settle, warm up some non-chlorinated water to 175F for use in the next step.
Drain off 1/3 of the whey. I use a large strainer to keep the curds out of the ladle as I remove about 2 cups of the whey and add enough of the 175F water to raise the curd temperature to 92F as I stir.

After the curds have settled for another 10 minutes, drain the whey down to the level of the curd.

Once again, add the hot water (175F) to raise the temperature of the curds and whey to 100F while stirring. Stir gently for about 15 minutes to keep the curds from matting. Then, let the curds settle for 30 minutes.

It’s time to stir in the caraway seeds that were previously saved after boiling. This is done quickly so the curds don’t cool very much.

Remove the rest of the whey and place the warm curd into a 2 lb. cheese mold which is lined with butter muslin.

Press at 20 lbs. for 20 minutes. (The leverage of a Dutch style press multiplies the pressure depending on the distance the weight is hung from the cheese.)

After the initial pressing, remove the cheese from the press, un-mold, remove from the butter muslin, flip and redress. Press at 30 lbs for another 20 minutes.

Final pressing is at 50 lbs. over night for 12 to 16 hours. (I did it for 14 hours.) Here you see a combination of weights to make a pressure of 50 lbs. Also, getting ready for the next step …

After pressing, soak the cheese in a saturated brine for 12 hours. Since the cheese floats, I put a small bowl on top of the cheese such that when I place the lid on my brine container, the cheese is forced to be submerged.

After about 6 hours of soaking, I flip the cheese so the end which was covered by the bowl is now at the bottom of the brine.
After removing the cheese from the brine, I dry it with a clean cheese cloth and place it in my drying box for 3 days. I install a fan in the lid of my drying box but I find that constant use of the fan dries the cheeses too rapidly on the outside, forming a rind which prevents the moisture from within the cheese migrating to the surface where it could evaporate. I use the fan only once a day for an hour which is controlled by my timer shown in the second photo here.


After the third day of drying, it is time to wax the cheese. In preparation for waxing the cheese, chill it in the regular refrigerator.

While the cheese is chilling, melt the wax (I use my hot plate). In the picture below, I am checking the temperature of the melted wax. It should be at least 240F. Although the dairy thermometer doesn’t register that high, the mechanism continues to rotate past the built in 220F mark to where the 240° mark would be if it were posted. It looks like I’m about 248° F. The control on my hotplate will maintain that temperature.

Immerse ½ of the cheese in the molten wax at a time, giving about a 30 second hardening time between waxing the halves. I do this for 2 dippings or coats of wax. Not being a traditionalist, I use uncolored wax.

After examining the waxed cheese, I notice what might be a “pin hole” on one of the surfaces, so I brush more wax on the spot. This is a natural bristle brush from Home Depot.

I place a damp towel in the bottom of my aging box.

The carrier pictured here separates the waxed cheese from the towel, allowing the cheese to be surrounded by very moist air.

The cheese is in my cheese cave with a hydrometer in the aging box. After a day in the “cave,” the hydrometer read 90%. (My cheese cave is really a small wine cooler I got on Craigslist. It is controlled by an external thermostat at 52° F ± 2° F.)


Now is the hard part-waiting (6 months) until July 5 when my siblings and I will celebrate our father’s birthday with his favorite cheese!
 *About Bob
Bob is a retired electronics engineer who has traveled all around the world, but now lives in Mandeville, Louisiana. He has written 7 articles for us so far (including this one), and we have done one about him (click here). We’re very grateful to him for his contributions to our community of home cheese makers.
These are his previous articles, listed in order with the most recent at top:
Cream Cheese Experiment
Bob’s Homemade Curd Cutter – Part 2
Bob’s Homemade Horizontal Curd Cutter
Making a Drying Box
About Cooking Curds
Creole Cream Cheese


