


This is the second in a 5 part series designed to help a novice make this fabulous cheese. To see the first part – “Why It’s So Easy!” – click here and the third part – “An Easy Recipe” – click here.
Camembert is, actually, a very easy cheese to make. There are a lot of recipes and videos online and they are all different, but they all lead to the same fabulous cheese. (The wide variety of recipes should be your clue that it’s very hard to “mess this up!”)
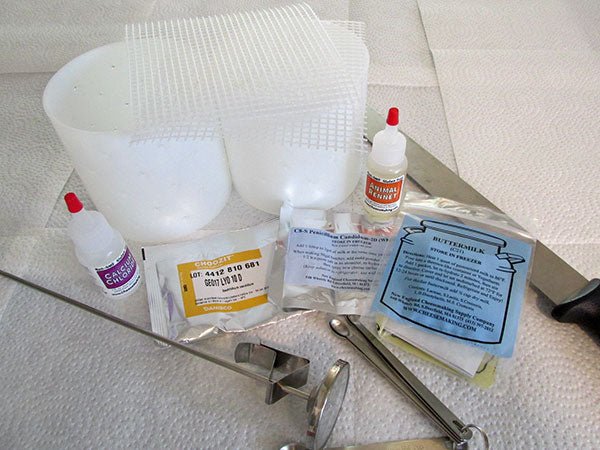
It’s literally ALL in the preparation with this cheese. There are certain ingredients and supplies you will need, but once you have them, you’re home free.
It might seem like a long list, but think about how much you pay for that Camembert you love so much! And think about how totally impressed your friends are going to be when you serve them your own, homemade Camembert!
You will want to order most of these supplies and ingredients in advance (from us, of course, at cheesemaking.com) but it won’t take long to get them – we almost always ship within 24 hours of the time we get an order.
Ordering
The recipe we are going to use in the next part of this series is for 2 Camemberts made from 1 gallon of milk. You will be doubling all the ingredients, if you want to make 4 at a time.
Note: There is a checklist you can print out at the end of this article.
Ingredients:
Starter culture – Buttermilk (C21) (1/8 tsp which is 1/2 pack), or any of the following: Mesophilic (C101) (1/8 tsp which is 1/2 pack), Mesophilic (MA11) (1/8 tsp), Flora Danica (C11) (1/8 tsp), Aroma B (C64) (1/8 tsp). You can use Fresh Starter (C3) if you want to make a mother culture, but you will have to determine for yourself how much to use- for example, you could try one ice cube worth.

1/16 teaspoon Penicillium Candidum (C8). There are many different strains of this and you can try a different one if you want. Ours is a classic white mold with anti-mucor properties (meaning it protects against unwanted fungi).

1/64 teaspoon Geotrichum Ckandidum (C7) (This is optional. It makes for a stronger skin, but many beginner recipes don’t include it.)

1/8 teaspoon single strength animal rennet (R7) or 1/16 teaspoon double strength vegetable rennet (R9). Basically, you can use any of our rennets, including 1/4 vegetable tablet (R4).

1/8 teaspoon calcium chloride (C14) or, if you want, you can mix up a 30% solution of Pickle Crisp using these directions https://muchtodoaboutcheese.com/2014/04/20/home-cheese-making-hack-diy-30-solution-calcium-chloride/

1/2 cup of non-chlorinated water (distilled is fine). (If you don’t have any, leave 1/2 cup of your tap water out on the counter overnight. Then, in the morning, heat it to boiling in the microwave and cool it down before you use it.)

4 teaspoons cheese salt (S1) or Kosher salt or any non-iodized salt like sea salt.

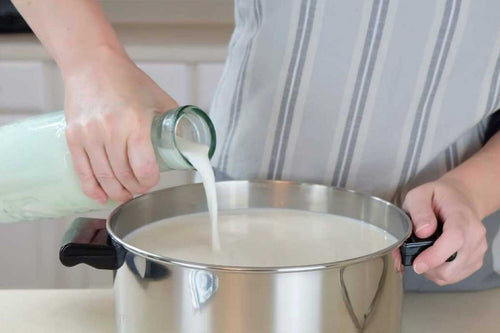
1 gallon milk (if you have access to raw milk, that’s great, but, if not, get the freshest store-bought milk you can (and don’t worry- some of the best cheeses in the world are made with pasteurized, homogenized milk). Do not use ultra-pasteurized milk and be careful about this because many brands of organic milk are ultra-pasteurized.

Supplies:
These supplies will be needed no matter how you decide to age your cheese. It’s a long list, but there are many opportunities to cut corners here:
Sanitizer (food grade)

Or, you can use bleach, vinegar, hydrogen peroxide, etc. (see Sanitizing 10 Easy Ways)

Or, you can use draining baskets such as our Basic Kit Mold (M222) shown below at right. Or, you can make your own molds by poking holes in a plastic container (just be sure to poke from the inside out!).

Photo from George Washington College website
4 fine-mesh plastic mats (MATFINES)

2 medium mesh mats (MATMEDS-S)

Or, you can use plastic needlepoint canvas:

Thermometer (a cheese thermometer (E4) or any that will measure as low as 90F)

Pot or bowl big enough for 2 gallons of milk. (Do not use aluminum.)
Curd cutter (E8) or long frosting spreader or a long knife that you don’t mind rubbing against the side of your pot


Curd Scoop (E17) (You will use this more than any other tool in your kitchen, guaranteed!)


Or, you can wrap your cheeses in parchment paper.
Gloves (E40-S) to wear when sterilizing supplies

New sponge or sterilized cleaning cloth
Cave (Ripening Box)
You will need a box to ripen your cheese for 7-10 days before you wrap it. If it has a rack built in (as many vegetable boxes do), that’s perfect. Otherwise you will need to use a rack that fits inside your box. The rack and box should be big enough to hold 2 cheeses, 4 inches in diameter.
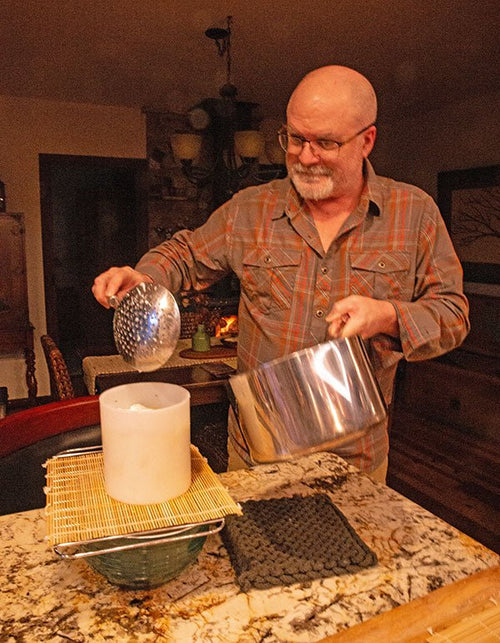
If you don’t have a small rack, you can use sushi mats or anything you have to hold the cheeses off the bottom of the box. (You will be using your plastic mats between the cheese and the rack, but the rack has to be made of something which is non-reactive (not aluminum) and which can be sterilized.)

If you don’t have a rack, you can use stainless steel cookie cutters to support your cheeses. (You will always be using mats between your cheese and the rack.)
These are a few of your options:
1. If you have a space in your home that is consistently 50-55F
This is a great position to be in because you can use any size container you have.

Your box doesn’t have to be high enough to accommodate the molds because your cheeses will be out of the molds by the time you really need your box.

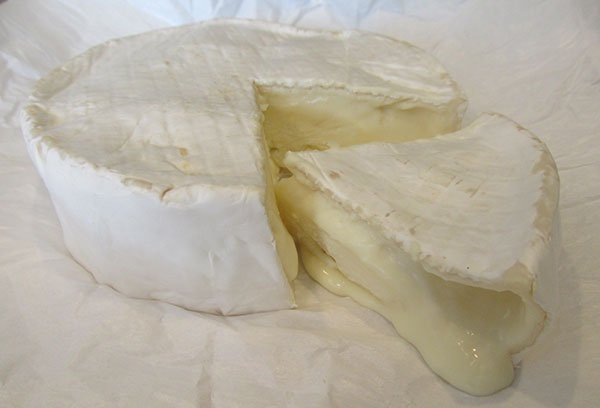
This is what your cheeses will look like when they are maturing in your box.
2. If you have a wine fridge or an old fridge you have made into your cave
Unless all you are making or ever want to make is Camembert, you will want to put your cheeses in a ripening box. So, you will need one that will fit into your fridge.
3. If you have a cooler
You will need a cooler you can sterilize, big enough for your 2 cheeses and a freezer block. (You will be swapping off freezer blocks every 12 hours, so you will need 2 of these.)
If your cooler is very old and you can’t really clean it, get a box that will fit into it and keep the freezer block outside the cheese box.

4. If you have room in the bottom of your regular refrigerator
This is a last resort, because it slows down the process and usually results in a milder tasting cheese. But, it can be done.
You will need a box that will fit in your fridge, as close to the bottom of it as you can get.
Are you ready to go??
Print this:
Ingredients:
Starter culture – Buttermilk (C21) (1/8 tsp which is 1/2 pack), Mesophilic (C101) (1/8 tsp which is 1/2 pack), Mesophilic (MA11) (1/8 tsp), Flora Danica (C11) (1/8 tsp), Aroma B (C64) (1/8 tsp). You can use Fresh Starter (C3) if you want to make a mother culture, but you will have to determine for yourself how much to use- for example, you could try one ice cube worth.
1/16 teaspoon Penicillium Candidum (C8)
1/64 teaspoon Geotrichum Candidum (C7) (This is optional. It makes for a stronger skin, but many beginner recipes don’t include it.)
1/8 teaspoon single strength animal rennet (R7) or 1/16 teaspoon double strength vegetable rennet (R9). Basically, you can use any of our rennets, including 1/4 vegetable tablet (R4)
1/8 teaspoon calcium chloride (C14) or, if you want, you can mix up a 30% solution of Pickle Crisp using these directions https://muchtodoaboutcheese.com/2014/04/20/home-cheese-making-hack-diy-30-solution-calcium-chloride/
1/2 cup of non-chlorinated water (distilled is fine). (If you don’t have any, leave 1/2 cup of your tap water out on the counter overnight. Then, in the morning, heat it to boiling in the microwave and cool it down before you use it.)
4 teaspoons cheese salt (S1) or Kosher salt or any non-iodized salt like sea salt.
1 gallon milk (if you have access to raw milk, that’s great, but, if not, get the freshest store-bought milk you can (and don’t worry- some of the best cheeses in the world are made with pasteurized, homogenized milk). Do not use ultra-pasteurized milk and be careful about this because many brands of organic milk are ultra-pasteurized.
Supplies:
Sanitizer (food grade) or, you can use bleach, vinegar, hydrogen peroxide, etc.
2 Camembert molds (M7) or you can use 4 draining baskets such as our Basic Kit Mold (M222) shown below. Or, you can make your own molds by poking holes in a plastic container (just be sure to poke from the inside out!).
4 fine-mesh plastic mats (MATFINES)
2 medium mesh mats (MATMEDS-S) or, you can use plastic needlepoint canvas:
Thermometer (a cheese thermometer (E4) or any that will measure as low as 90F)
Pot or bowl big enough for 2 gallons of milk
Curd cutter (E8) or long frosting spreader or a long knife that you don’t mind rubbing against the side of your pot
Cheese skimmer (E15)
Curd Scoop (E17)
Mini measuring spoons (E20)
Cheese Wrap (MRPS) or, you can wrap your cheeses in parchment paper.
Gloves to wear when sterilizing supplies
New sponge or cleaning cloth
Cave (Ripening Box)


